Recently added

Most read

Why use the water-soluble lacquers, when the conventional ones are available?


How to pick the right color for your car
How to pick the right color for your car
Many factors are involved on how we perceive the color of the car.
Among them are:
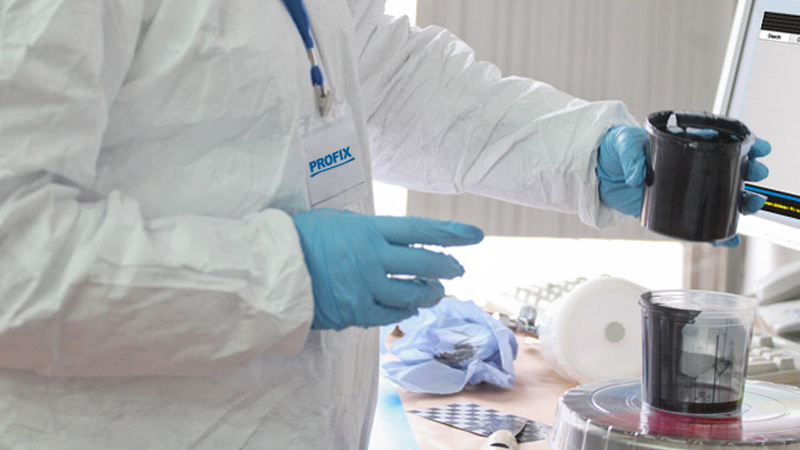
With these factors in mind, paint manufacturers prepare several variants for a given color number. With a few nuances of color, we can prepare a mixture of ready-to-use color that is closest to the original.
This is especially important when car is being renovated, where the goal is to reproduce the original coating. The first step before repair is to determine the color number. The easiest way to do this is by reading it from the car's rating plate.
Check your car in the color of your choice - check the RAL color chart.
Finding such a plate is not always easy, as every car manufacturer puts this information in different places.
This number can be entered into the recipe program.
With the recipe in the program - we get information on where to find the specific color in the color documentation. The program also displays information about variants of a given color.
Here's an explanation for the individual signs:
- D - darker
- P - paler
- L - lighter
- R - more red (redder)
- B - more blue (bluer)
- BR - more brown (browner)
- Y - more yellow (yellower)
- G - greener (greener)
- DI - more gray (greyer)
Numbers like "1" or "2" stands for enhancement of the effect, e.g. Opel No. 547 (B1) - means a more blue color variant than Opel 547 (B)
Proceed to compare the template with the repaired element.
The basic difficulty is that cars are often repainted and have several different shades. These shades are skillfully masked by so-called shading, so choosing the right color for one part of the car does not guarantee a good effect for the rest. Another mistake that affects the wrong color matching is checking the shade in a closed space (garage, workshop, painting booth). Artificial lighting distorts the perception of color.
The color must be evaluated in daylight, although too much sunlight sometimes botheres. The alternative is to have a lamp that imitates natural lighting.
The place to make the comparison has to be clean. Polishing pastes are the way to do it - we recommend to start polishing with EASY paste and then polish the place with WAX milk. When comparing, remember to make a comparison in a few angles.
After these activities, we prepare a "pilot" mixture for a test spray.
Remember to accurately reproduce the later conditions of painted car, e.g. proper air pressure, number of layers and spray gun. Minipistols with a smaller nozzle are often used in the mixing chamber, which reduces the reliability of the test spray. Before painting, make sure that the corrosion protection coating in the repaired area is properly recreated. This also applies to the color of the undercoat, which is of great importance in the final result obtained by painting.